lifestyle

How to give your home a spring makeover on a budget.

Bunnings Warehouse
Thanks to our brand partner, Bunnings Warehouse


I have a DIY confession to make.

I’ve been known to rock up at Bunnings on the weekends and create myself a little personal decorating challenge when I’m looking to brighten up my home. Particularly during springtime when all of the new season design trends come out.

I might even hear Vogue Living editor Neale Whitaker’s voice in my head as I stroll the aisles, telling me how inspired and fabulous I am…

Please tell me I’m not the only one?

You see, my problem is that I have a very expensive taste. Only my personal style and back pocket couldn’t be further apart. But then enters Pinterest and Instagram, where all of my DIY dreams come true on a teeny tiny budget. Because if there’s one thing I like more than gorgeous interiors, it’s a bargain.

Better yet, you probably have some of the materials you need lying around the house. Really, there’s nothing stopping you.

So what are you waiting for? It’s time to compete DIY.

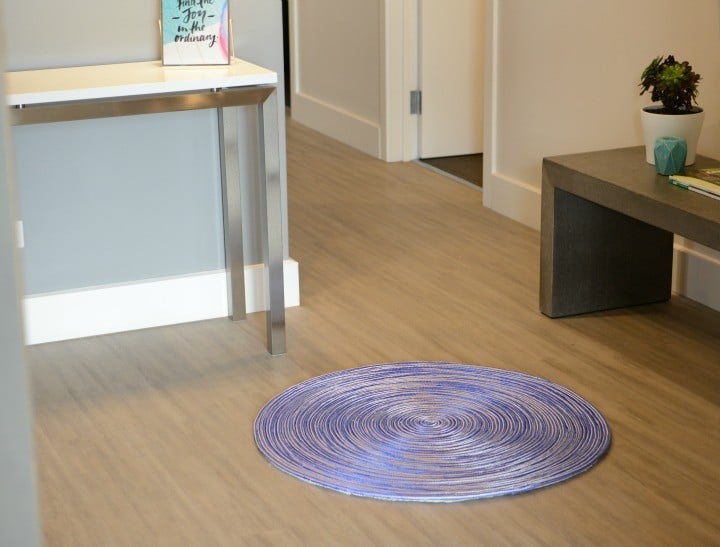
1. Rope Mat.

Have you ever gone into a store and thought if I had the right materials, I could make that for half the price? Well we all know a good rope mat can cost a mint. But really, all they are is a bit of cable wrapped in a circle. So what’s stopping you from making it yourself?

The answer is ab-so-lute-ly nothing.

By dabbling in a bit of DIY, you also have the added benefit of choosing how big or small you want your mat to be. That means you can create the perfect size for your living space. Bonus.

ADVERTISEMENT

Tools.

Blue and white stripe multi rope

Hot glue gun.

Scissors.

Non-slip mat.

Instructions.

Step 1: Things are about to get a little messy so ensure you protect your workspace from the hot glue.

Step 2: Take your blue and white stripe multi rope by the end, placing it firmly on the board and wrap it around itself. Grab a friend to help you apply the hot glue to keep it in place.

Step 3: Now continue to wrap the rope in a circle and apply glue to the outside of each new ring as you go. Stop when you’ve reached the size you would like for your mat.

Step 4: Trim the end of the rope with a pair of scissors for a clean edge and glue the final piece into place.

Step 5: Take the non-slip mat and cut it to size depending on how big you made your rug.

Step 6: Use your trusty hot glue gun to glue the mat down in sections, this will stop the glue from drying on you too early.

Step 7: Trim away the excess non-slip mat.

Step 8: Wait for it to dry and then place it in your house to show off.

ADVERTISEMENT
DIY ideas
“Step 8: Wait for it to dry and then place it in your house to show off.” Image: Supplied.

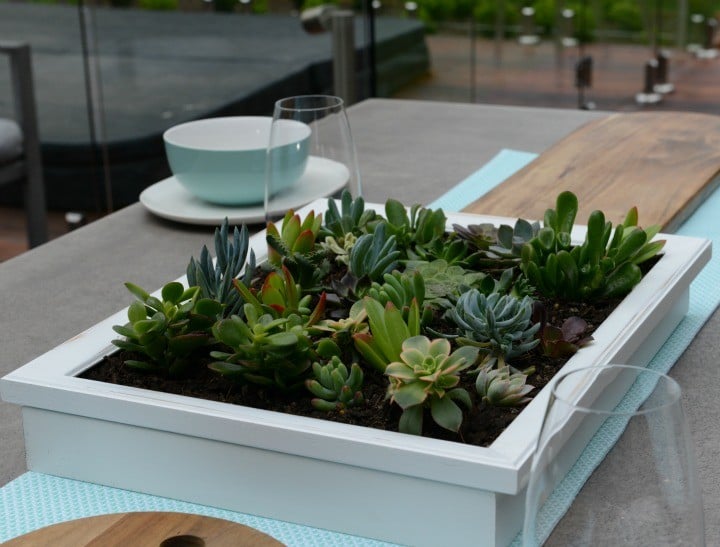
2. Table Top Garden.

If you have minimal space in your home but love a bit of a garden, I’m about to become your new best friend. Introducing the table top garden, which will put any pot plant you’ve ever put out the back to shame.

If you’ve got an old photo frame lying around at home, this is your chance to do some recycling because you can use it as the base. Yes, really.

The table top garden is super stylish while being super easy to make at the same time. Plus if you’re like me and could easily kill a cactus, they’re really easy to maintain and look after.

ADVERTISEMENT

Promise.

Tools.

Photo frame.

Timber.

Drill.

Thick paintbrush.

Lacquer.

Wire mesh.

Bonsai mix.

Range of succulents.

Instructions.

Step 1: Cut a piece of timber to replace the back of the photo frame.

Step 2: Drill drainage holes into the timber (because we want to keep those succulents alive).

Step 3: Insert the timber backing into the photo frame, then nail in the timber for extra support.

Step 4: Get a thick paintbrush and use it to coat the inside of the frame with lacquer. (This will help to seal the edges of the frame).

Step 5: Be patient (I know, it’s hard) and leave it to dry.

Step 6: Cut the wire mesh to size to fit in the base of the frame, put it aside.

Step 7: Add a layer of bonsai mix to the bottom of the frame, then put the wire mesh in.

Step 8: Take your succulents out of their pots and feed the roots through the wire mesh in an arrangement that you like.

ADVERTISEMENT

Step 9: Add another layer of bonsai mix around the base of the succulents making sure to cover up any wire mesh that is still visible.

Step 10: Now you’re ready to go pop it on your outdoor table and marvel at your brilliance.

DIY ideas
“If you have minimal space in your home but love a bit of a garden, I’m about to become your new best friend.” Image: Supplied.

Congratulations, you’ve reached expert level in DIY. I guess I’ll see you on at the finish line I mean, at Bunnings…

Have you tried any DIY projects lately?

00:00 / ???